This article or section is not written in the formal tone expected of an encyclopedia entry, meaning it relies heavily on colloquialisms and unprofessional verbiage. The perspective may be written from a first- or second- person point of view, when third person indirect is required. See the style sheet and the writing guideline for suggestions.
|

|
- For other uses, see Siege at Firemoth.
Siege at Firemoth is a quest available in The Elder Scrolls III: Morrowind. It was added with official plug-in of the same name.
Objectives[]
- Meet Sellus Gravius at the Census and Excise Office in Seyda Neen
- Meet with Aronil, Hjrondir, and Mara and take a ship to the fort
- Fight your way through the fort to the tomb below the island
- Defeat Grurn and retrieve the Ward of Akavir
- Return the shield to Sellus for a reward or keep it
Walkthrough[]
To start, talk to Sellus Gravius at the Census and Excise Office in Seyda Neen. Ask him about "Firemoth," and he will set you up with a ship and a crew to sail there and re-take the fort. Then head out to the docks, where you will meet Aronil, Hjrondir, and Mara. Talk to Silm-Dar, the Argonian shipmaster there, and he will take you to the island.
When you arrive, you'll find yourself on the northern edge of a circular ring of islands. Go either direction, and you'll soon start running into hordes of skeletons. There are lots of skeletons (half of them archers) on these islands, and more in the Keep, so you'll need to pack a good supply to last through them all. The Keep is on the southern edge of the ring, so either direction you go will work. If you take the western side of the ring, you might find a secret entrance which skips half of the dungeon, but you're also missing out on a lot of good loot, so it's your choice.
The Keep itself is relatively straightforward. If you approached from the east, you'll first see two Guard Towers out front. There's very little of value in them, though they do provide a good respite from fighting if you need to rest, as there are no enemies inside. The exterior of the Keep is guarded by many archers on the walls, so you'll want to run in fast to take them down. You could try archery or magic to shoot them from the ground, but there's a lot of them, and they have advantage of high-ground as well as numbers, plus you've got three relatively stupid warriors to protect if they haven't gotten themselves killed already, so the direct approach is most likely to keep everyone alive.

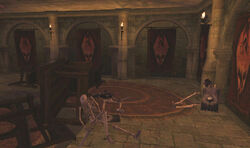
Barricades in upper chamber.
Once you've secured the area, you can either enter via the front doors, or through one of the doors in the two towers in front. They both lead to the same general area, but you can avoid most of the enemies via the tower entrances. From the main room here, you can go to the stairs at the back of the hall to reach the Upper Chambers. Inside is a corpse carrying a key which helps to gain access to the lower areas. Or if you want to avoid fighting, enter through the towers and just go down the stairs as low as you can go, avoiding the hallway that leads to the main room. The stairs to the Great Hall are at the bottom.
The Great Hall is a very large, open rectangular room with lots of skeletons. There's nothing of real value here, but it's pretty hard to avoid having to fight every single one of them getting to the other side, and the doors to the Guard Quarters.
Now you're in the Guard Quarters. One thing not to miss is just before the stairs leading to the next section, turn around to your right and examine the wall behind where you came in. You'll find a secret door and a passageway that leads to a room with a bunch of nice treasure in it. The door to the next section, the Dungeon, is locked. It's a 50-point lock, or you can use the key if you got it before from the Upper Chambers.
Once you enter the Dungeon, you'll be fighting rats. Lots of them. Not very difficult, except that there's over 30 of them, and all carrying diseases. This room appears straightforward, but instead of going straight through, look at the prison cell to the right of the stairs downward. You'll find a second secret entrance to the next section which gives you access to some more help.
Either door from the Dungeon will lead to the Mine. If you took the secret door, you'll be in a passage with a lot of Violet Coprinus and Luminous Russula, and at the end, you'll find a reinforcement, a Khajiit archer named J'Hanir. A short drop from this section will lead to the main part of the Mine, which is where you'd have ended up if you took the other door. There are some Raw Ebony rocks here.
Past the Mine are the Upper Caverns, a pretty much linear path leading down to the next section. There are three skeletons here.
The Lower Caverns are next: more ebony, more mushrooms, more skeletons. And you'll notice as soon as you enter the door you would have come in through if you'd taken the secret entrance from the outside of the Fort. This is yet another linear dungeon leading to the final section.
The last area of this place is a tomb in the Velothi style, swarming with skeletons, and all led by Grurn, a powerful lich. His primary attack is an area-effect shock spell, and he regenerates Magicka so fast that he can keep it up forever. His health also regenerates, so you need to kill him quickly or he'll just heal up again. If any of your companions have managed to make it this far, this is where they will almost certainly die. His spell does 100 points of damage over 5 feet. In addition, Grurn has a shield which gives him a constant effect Luck boost, which will make him somewhat hard to hit. Once you kill him, claim the prize, the Ward of Akavir.
Return to Seyda Neen. If you don't like the shield, you can give it to Sellus Gravius for a 3000 gold reward and 2 points of Reputation. Or you could sell it to somebody else for more money — it's worth 5000. Otherwise, just keep it.
Keeping all the followers alive[]
If you intend to keep all three (eventually four) companions alive and have sailed with the first three, this is challenging, and not practical except for high-level characters who can cast spell after spell while shrugging off assaults from multiple archers and your own spellcaster ally. (It's also arguably what makes this quest fun at all for such characters, since the monsters and loot are not leveled – there aren't even any Skeleton Champions. This quest appears to have been written with level 5–10 characters in mind.) Aronil casts Shockball, a lot, with no regard for who may be in the way, including you and his two comrades. Mara (who is really rather weak for a mission like this) will often die from this friendly fire in the very first engagement. One strategy is to cast Calm Humanoid on her periodically to keep her out of the fight, and to cast Restore Health on Hjrondir frequently, and leave most of the fighting to him and Aronil. Unlike with Calvus Horatius, you cannot access these companions' inventories to give them healing potions or better gear, nor can you order them to wait while you go ahead. Another strategy is to leave Aronil behind with a Calm, and do most of the fighting with the other two. A different approach is to stay in deep water as much as possible and return to it, leading the skeletons into the sea for swimming melee (but note that the companions do not have water-breathing ability, so keep it at the surface, and listen for drowning sounds). If you have the Boots of Blinding Speed or another way to greatly boost your speed, you can also simply outrun all the companions quickly on land and do most of the fighting yourself.
With the companions in tow, you are very likely to need to use the Console command ToggleCollision (TCL) in the Keep one or more times. Imperial architecture is not very follower-friendly, and there are several places where the companions can box you in with no other convenient means to get past them and continue. Other options include teleporting off the island and returning to it, or casting a Demoralize Humanoid on them to get them to run around for a while and get out of your way. Armed with this forewarning, you can also cast Mark in an open area in the Keep in case you get stuck this way.
As noted above, you are best off in the Grurn fight closing with the lich yourself, leaving the followers to deal with the skeletons, and despatching Grurn as quickly as possible with fast weapons, since he can kill most of your followers in one to two spellcastings.
If you manage to keep any or all of your original followers alive and return to the ship with them, they will return with you to the mainland and stay on the ship. J'Hanir is different: If you've picked him up as a follower, he will be one until killed. He cannot, however, take the ship back to the mainland with you. You can return to Firemoth manually across the water (e.g. for more of the piles of heavy Imperial Steel Armor and Raw Ebony loot here), and then you can bring him home with you the way you came. If you killed Grurn before finding J'Hanir, this NPC will never enter follower mode, and he'll simply stay in his mine cave indefinitely.
The ship, along with the captain and any of the surviving original three followers, will disappear from the game after you turn over the Ward of Akavir to Sellus Gravius. J'Hanir does not vanish in this manner. Keeping the shield and not taking the ship home (see bug section) can actually net you all four companions as permanent-until-death followers.
Journal[]
| Siege at Firemoth – ms_firemoth | |
|---|---|
| ID | Journal Entry |
| [?] | Sellus Gravius of Seyda Neen has tasked me with leading a band of adventurers out to the overrun fort of Firemoth. It is there that we will fight the skeleton army of Grurn and return with the Ward of Akavir. |
| [?] | I have returned the Ward of Akavir to Sellus Gravius in exchange for 3000 |
Bugs[]
|
This section contains bugs related to Siege at Firemoth (Quest). Before adding a bug to this list, consider the following:
|
- A bug (possibly triggered by the presence of J'Hanir) may cause the boat to not take you back to Seyda Neen: the captain will ask if the Nerevarine is ready to return, and then nothing will happen when one answers "Yes." If this occurs, one will have to swim (or otherwise traverse the sea manually) to the mainland. There is a large island to rest on, about halfway to Seyda Neen, though Hla Oad is also an easy swim. The companions will remain in follow mode. Silm-Dar will remain on the island with his ship. One can leave them all there using spells, like an area-of-effect Demoralize Humanoid that lasts long enough to swim to the Bitter Coast cell, not far off-shore. Another option is to outrun them on land, then swim. Alternatively, one can just keep them while they last. Except for J'Hanir, they will still disappear if the Ward is turned over to Sellus Gravius.